Sunday, December 16, 2012

What's Happening Inside?


This has been my plan since the slab was poured.

As you know, if you have read these entries from the beginning, the plan has evolved.  But when the slab was poured, I was committed to the placement and layout of the bathroom, the placement of the work space wall and power in the floor for the table saw.  This is still the general layout.

Every time we make the trip from Virginia to Illinois, we need to bring as much of our stuff as possible. So, even before we had a place to put it, stuff was piling up.  So, I started building the shelves on the West side (top of floor plan).  I soon realized that I needed to build the wall that the shelves abut, first.  I probably could have just built the short section that attached to the shelves, but it seemed more efficient to build the whole room first.  So the stuff got piled a little higher.


We did spend quite a bit of time working there this Fall, but the progress inside was interrupted repeatedly.  The last couple of entries explain a couple of the things that were a higher priority: the outside stuff needed to get done while the weather was nice, and the wood stove needed to be found and installed before the weather turned too cold.  The inside work went slow, but I did get the power breaker box installed, power brought into it, 2 ceiling lights working, the work space/bathroom framed out and the lowest shelf built.  The long list of things to be done next inside the shop includes: finish shelves, wiring, lighting, plumbing, and drywall.


During our most resent trip, Jan spent part of the time getting to know her new twin Granddaughters in Minnesota.

When she re-joined me and saw the new walled in space, she said, "We could live in here."  I was more than a little bit shocked.  But the more we talked about it, the more sense it made.  Our very first plan was to build an apartment in the end of the shop to live in for a while.  That plan was much bigger; something we could rent out later.  We abandoned that idea as too much of an expense and we would not want rental property attached to the shop.  We  had settled on buying a camper trailer to live in during the next phase; either building a spec house or our own.  Standing in that space in the shop, we realized that it is basically the same size (maybe bigger) as we were considering for a camper.  

The only major thing we would have to do to make this a livable space versus work space, is to install a septic system.  As a shop, I planned to use the bathroom strictly as a grey water set-up (utility sink, shower), but had roughed in a toilet for possible future up-grade.  I am hoping that a septic system can be installed far enough down the hill to serve our future home as well.  I did consult with our septic guy about a system for our house (not really looking at hooking to the shop at that time).  He said the site was do-able, but, we will need to clear and build the driveway and clear the house site in order to gain access to the place where the septic system would go.

The space that will become our temporary home will easily revert to work space when we move on.  The only permanent thing will be 6 feet of base kitchen cabinets that will serve as our kitchen and later be storage and bench space.  This will also give us a place to keep (and use) much of our furniture, helping with a potential storage problem.  One other good thing about this:  living within the shop, in 300 square feet, with no real kitchen, and a funky bathroom will be MAJOR motivation for building a real home.

Monday, December 3, 2012

Heat for the Shop

I have figured all along that I would heat the shop with wood.  I've done it in the past and it makes lots of sense.  A woodworking shop generates almost enough wood waste to keep it heated.  And I have an unlimited supply of firewood on 20 acres surrounding the shop.  I will have the back end of the building closed off  10 foot deep and the full width for cleaner and conditioned space.  That space will be able to be heated and cooled mechanically, so the heating in the main space is less critical. I had been looking for a stove on eBay and Craig's list and in classified ads for a while.  I finally found a beautiful stove on Craig's list, but it needed a little repair and was an hour and and a half away in Centralia.  I bought it anyway.  It was made by the Curtis Co. in St. Louis. I spent a day or so repairing it and a couple more installing the flue and chimney.  When Jan came back from Minnesota, she built the first fire.  Later, I'll install a ceiling fan up high over the stove to push that hot air back down and help circulate it.  I also plan to close the walls behind it with cement board and (probably) tile.


A walk in the woods.

Here are some photos I took when we went on a walk down into Moss Hollow the Monday after Thanksgiving:


Fall is the Best Time to Plant Trees and Shrubs

Fall is the Best Time to Plant Trees and Shrubs

It"s also the best time to find bargains on plant material.  I had been resisting buying any more plants, since we will be moving all our stuff 800 miles, but just couldn't stop myself.  We had another trip planned to So. IL. the end of October.  With Hurricane Sandy on it's way, we got out of Dodge.  We took both my truck and Jan's car.  A week later, she drove on to spend a couple weeks with her daughters and new twin Grand-babies in Minnesota.

A few days before we left, I saw that the Leesburg Home Depot was closing out all their nursery stock cheap. I couldn't resist.  I bought a bunch of azaleas and rhododendrons.  I also started digging and dividing the perennials that we have collected or moved from our last place in Georgia.  Pots filled the floor of Jan's back seat and the entire back seat and floor of my truck.  We usually leave Mr. Q (my parakeet) with our landlord, Walter, but since we planned to be gone for about a month and were quite sure his power would be off for an indeterminate time (remember Sandy was on her way), he rode with me.  He actually seemed to enjoy the ride.

Jan planted the azaleas and rhododendrons in the "island"  under the big walnut trees between the driveways.
We planted the first load of perennials, day lilies, bee balm, cone flowers, daisies, along the new board fence.  And 5 burning bushes went in the ground by the gate and at the end of the shed.  Earlier, I planted 3 bargain trees from the Carbondale Lowes (pink dogwood, coosa dogwood, redbud) along the inside of the fence. 

Actually, before we planted anything, we built the three board "Virginia" fence and hung the gates.  The space between the gates, at the end of the "island" (right behind Jan in the photo above) will be a horse jump/sign.  I have my eye on a large cedar tree near by for this.  Hopefully next trip.  Next year, with the fence painted black, the jump built, and all the plants growing, it will look amazing.


Thursday, September 27, 2012

In The Trenches


The buildings are up, doors, windows, gutters, and cupola.
The white stakes and pink tape indicates a tentative plan for board fence and gates.  I needed to figure this out to be sure I didn't put the water pipe where I will want a fence post later.

The next thing was to spray foam insulation inside the shop shell.  We chose a high density polyurethane foam.  It has a high R value, adds some structural strength, and has a more durable surface.  Some of it will be left exposed so the harder surface is important.


Of course, I had nothing to do with process.  This work was done by a local insulation contractor.

My next thing was trenching in the water line, the power, the grey water drain and the gutter drain.
The water line runs from the main line (that we found when the water company turned it on) to a small manhole with a T and valves where it branches towards the shop and stubs off for the future run to the house.  Between the valves and the shop, I installed a frost-free hydrant.  I rented a walk behind ditch-witch trencher to dig the trenches, almost 300 feet total.  That all went pretty well;  finished a bit early and was going to return the machine so I could get a jump on cleaning out the trenches.  As I was running it on to its trailer, the handles jerked up sending a lightening bolt of pain into my shoulder and then dropping down slamming the fore mentioned shoulder.  Well, I got the machine back to the rental place and then a trip to urgent care.  No broken bones, but no more work for a while either.


This should be a clue why I haven't updated in a while. 
After a bit of rest and massage, we returned expecting to find caved ditches full of mud or baked clay.  Actually, things looked almost as I left it.  I did hire some help with the physical digging (my shoulder is still pretty jacked 2 weeks later).  Al (from the foundation insulation digging) and Grady (Ellie's wedding planner, among other talents) saved my health.  It still took quite a while to get all that pipe and wire in the ground.  I used 1 inch PEX tubing for the water and made the connections with shark-bite fittings.  They are very cool and incredibly easy, but expensive.  The pipe just shoves into the fitting and it locks in.  That's it!  It can be released with a little tool.  I did have a problem with the transition from the main (schedule 40 pvc) and the pex.  I had to buy a special fitting to make that transition ($38).  All good.  No leaks.  Fill in the dirt.


                                                            Jasper kept busy, hunting.

Sunday, August 26, 2012

The Shop Gets Built

Rick's crew was scheduled to set the roof trusses next.  They would set perlins and windows and lots of odds and ends before the closed in the walls.  I figured I had enough time between the big concrete pour and when they covered the walls to rough in the plumbing and pour the bathroom floor. That gave me the option to run the concrete chute in through the wall.


As it turned out, the concrete truck driver thought it would be best if I wheel barrowed it in from the big door opening.  That wasn't too bad as we had a very nice floor to run the wheel barrow on. I used blocks of Styrofoam to leave space around the shower and toilet drain pipes so I could set the flanges more precisely later.


It all went well.  Sorry I didn't take a picture of the finished floor.  I set a capped toilet flange to leave the option of a toilet for the future.  There is a drain for a utility sink and a floor drain in a lowered area at the end of the room for a shower (or dog wash, etc.).  The drain runs under the slab (2 feet deep) to a T and clean-out just out side the building.  I also stubbed in a water supply pipe.  The outside connections to these pipes will be done later.


By the end of week 2, it looked like this.  Yet to be done, overhead garage door, gutters, and cupola.


 Originally, we had designed the shop to have a 16X24 foot open shed addition, but when laying out the site, we couldn't make it fit.  So, we opted to build it detached.  I had decided to put it parallel with the shop, even with the front with a 23 foot space between.  This was as far from the shop as I could place it before it got too close to the power pole, or road, or the place where Jason buried the trash left from clearing.  The spot for this shed needed to be leveled   But after Jason leveled the spot and we could actually see it, we realized 23 feet was not enough room to turn a vehicle (or especially one with a trailer) into the shed.  Jan and I scratched our heads and tried all kinds ways to make it work.  Finally, we simply twisted it a bit towards the front.  It's not great, but it is possible to pull into the shed and still have enough room to drive between the buildings and around the end of the shop.


I've been wanting to hook up the water since we first started burning our cleared brush, but it just hasn't worked out.  I did make a move in that direction, though.  I called the water company to come out and turn on the water, just to see if we had any problems with the valve, etc.  The meter is way off the North East corner of our property, at least 300 feet from our driveway.  When they turned the valve, the meter spun and didn't stop.  Something was certainly wrong.  Turn it off.  We walked down the road toward our drive and there was a nice river flowing from a spot on the edge of the road by the driveway.  I dug it up and found that when the phone company ran their wire, they shredded our water pipe.  Oh well, at least now we know where the pipe is.


Now, I've got to get back to work for a while.  I mean work where I get paid rather than work where I pay.
Next time we see Moss Hollow, the shed and shop should be built and I can run the power and water and get Jason to do a finish grade.  Then lots of gravel, finishing the inside of the shop, landscaping, and planning the next phase: house.


Saturday, August 25, 2012

Pure Inspiration

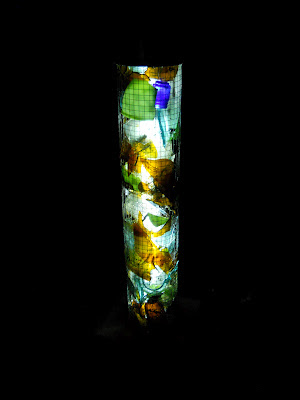
A while back I had a crazy idea.  I was thinking about cleaning up the bottle dump on our property.  Although it poses a bit of a clean-up problem, it really is one of the only remnants of the historic occupation. 

It came to me in a flash.  The idea was to use the broken glass in a column of light.  A series of them would be stunning marking a path through the woods.

So, when I found myself with a little free time, before the concrete was due, I thought I'd give it a shot.  I wanted to give it a heavy, concrete base, so, since the concrete truck was coming anyway, I made a simple box form and installed a 1.25 inch PVC elbow in the middle with a length of pipe sticking out the side and a florescent tube cover vertically up the middle.  I fashioned a 6 inch diameter column of hardware cloth; ready to be stuck into the concrete. I had a 6 inch PVC cap ready as well.

                                           This what it looked like after the concrete was set.

I fed a 50 light string of clear LED Christmas lights through the tube.  I think next time I will put the lights in before the concrete. It was a bit dificult to get the plug to make the turn through the elbow.


  I then set broken glass from the dump in the space between the clear tube and the hardware cloth.  Then capped it with the PVC cap.  It looked like this:
It certainly didn't look like much in the daylight, but at night it ain't bad.  It looks pretty much as I had pictured in my vision.  I don't see much I would change.  One thing, for sure.  I had used 1/2 inch hardware cloth.  Some of the sharp glass does stick through, so next time I'll use 1/4 inch.


Back To It; The Shop Rises

After a week in the North Woods on a lake straddling the Wisconsin Michigan boarder, we got back to work on our property in S. Ill.

Our pole building contractor, Rick, was scheduled to  begin the shop building on Monday, August 6 and they got right to work.  In our absence, Jason had done a final grade on the site; providing a much leveler pad for the building.  Before this work, the place where we laid out the building had a 2.5 foot elevation difference from corner to corner.  Jason got it very close to level with a bit of cutting and filling.

We chose pole construction because of it's efficient use of time and materials.  It certainly did go fast.
It looked like this by Tuesday evening, almost ready for gravel and concrete:


The one thing we needed to do before the concrete could go in was to install the perimeter foam insulation.
I talked about this in the previous post.  Go back if you missed it.

We scheduled the concrete at this point (no roof trusses) so that the gravel truck and concrete truck could back into the building to dump.  I planned a bathroom in one corner, but knew I wouldn't have time to rough-in the plumbing before the concrete pour, so I set a couple of forms to pour it later.  The gravel base was set, and the concrete was poured.


Insulation Odyssey

In the last post, I talked about the foundation insulation.  I did pack it up in Virginia and haul it to Carbondale via the U. P. of Michigan.  It was a bit tight in the cab, but Jasper did not have to ride on top.  By the time we unloaded in Southern Illinois, the foam had traveled 2000 miles.

The foam insulation was to be installed vertically around the edges of the concrete slab 2 inches thick and 2 feet deep.  The idea is to trap the heat in the slab and soil beneath.  The foam would need to be installed after the walls were framed, inside of the band board (which also serves as the concrete form).  Then the concrete would be poured.

At this point, I'll jump ahead to the foam stuff, since that's the topic, here.  But a couple things happened first.  So if you want to keep things in strict chronological order, stop reading and skip to the next entry.

Any way, back to the foam.  I had a relatively small window of time to get it installed.  The band board was set on Tuesday and Jason wanted to get the gravel base for the concrete in on Wednesday or Thursday and pour on Friday or Saturday.  In the middle of a horrible drought, the soil was hard as rock and it was August in Southern Illinois (hot) and I'm old.  So very luckily, I found some help:  Super Al.


 I must admit, Al did almost all the digging while I cut and fit the foam.  Al got all the digging done and I fit most of the foam in one day.  The next day I fit the rest and back-filled the soil around the foam that Al hadn't gotten to.


The final step in this process was to wrap the top exposed edge of the foam board/band board sandwich with self adhesive rubber flashing.  This will act as an additional termite barrier as well as moisture flashing.


 So, that's ready for gravel base and then concrete.  Oh, one other thing before the concrete. I want to rough-in a bathroom in one corner, even if I never add the toilet.  And I really didn't have time to dig in all the plumbing before the concrete pour, so I formed off that part of the floor to be poured later.

That's that.  Next blog, back to before the foam.

Sunday, July 8, 2012

shop insulation

Just a quick note on my plans for insulating the shop.

As to the shell (walls ans roof), I have been planning to spray a layer of foam on the entire inside of the structure after all the electric, etc. is roughed in.  I may add some supplemental fiberglass batting, especially in the area where plumbing will be and in the area I plan to keep semi-heated (some times cooled).

All along, I have been debating if/how/how much to insulate the concrete slab floor.  When I was planning to live in an apartment in there, it was a no-brainer.  But, now, it will just be shop space, not living space. Mostly heated with a wood stove. I know it would be a big energy saver, but, I've been thinking that the expense and hassle of placing foam under the slab was just too great.  In addition to the cost and complications with perimeter and under slab insulation, termites and ants (including carpenter ants) are quite active in Southern Illinois.  They LOVE foam.  So the prospect of putting a layer of foam under and around my shop floor is asking for trouble unless painstaking attention to detail is used in flashing and termite barrier installation.  I discovered a product that helps with this problem. Some foam manufacturers offer foam with an additive that repels and even kills insects.
 http://www.mid-atlanticfoam.com/EPS/images/performguard-board.jpg
 It is harmless to people, plants and animals, but toxic to termites and their kin.  I believe it is basically Borax.  This type of foam is commonly used in ICF's (insulating concrete forms, see: www.icfhomes.com) and SIP's (structural insulated panels, see: sips.org).  No building material suppliers, that I could find, could supply me with this kind of foam in sheets.  In fact, I don't think they had a clue what I was talking about.  I did find a company that makes it and they have a factory in Winchester, VA, just over the Blue Ridge from where we live in Virginia.
 http://www.mid-atlanticfoam.com/EPS/termite-resistant.asp
I emailed them to find out where I could buy this stuff and, to my surprise, they asked me what I needed.  Small quantity? Custom size? No problem.
OK, now I had to make the big decision, " Do I actually do this?  And if I do, how much should I do?"  Recommendations are all over the spectrum.  Some say as much as 12 inches under and around the slab; totally isolating the mass of the concrete.  Another train of thought is to insulate only the perimeter. This utilizes the ground under the slab as well as the concrete as a "heat sink".  This has always appealed to me.  I decided this was the way to go, if I could afford it.  I don't want to devote a lot of effort into this, as I will have a small window of time between when Rick's crew sets the foundation boards (the foam would be placed inside of these) and when Jason's crew will pour the concrete. So the plan is to just put 2 inch thick, 2 foot X 4 foot foam panels inside the foundation boards and wrap the top with rubber flashing.  Concrete will be poured inside of that. The only thing is, even though this is the cheapest option, it's a lot of perimeter length.  How much will this cost?  So when Donna, from Mid-Atlantic Foam quoted me $133.29, I said I'll pick it up Monday.

The next minor problem:  Getting the foam 800 miles West.  That really shouldn't be a big deal, but our next trip to the property to actually start building will be via Land-o-Lakes, Wisconsin.  I'd really rather not drag my trailer all that way.  If I figured right (fat chance), the foam will just fill the bed of the Tundra.  I don't know what else I will need to take, but if it doesn't fit in the back seat or on top of the foam, it ain't going.  I may have to pull a Romney with Jasper!
WHAT????

Thursday, June 28, 2012

The Shop

Our first building priority has always been to get a shop space built.  I have tools, materials, hardware, antique light fixtures, paint, stain, and all kinds of odds and ends (not to mention record albums, furniture, old toys, electric trains, and a rock collection; thanks, Lola) stored in locations up to 800 miles apart. The first thing I need to do on our property is provide a save, dry place to store and use all my crap.  So, we have been slowly, but surely working toward that goal.  To make this go as quickly, efficiently, and cheaply as possible, we decided to build a conventional pole building.  We hired Rick Ward, a pole building specialist to build the shell. He has agreed to build the shell for us in stages.  First the walls will be set, which should be done in just a couple of days.  At that point, Jason (son-in-law) will bring his crew in to pour the slab floor.  Without roof trusses set, concrete trucks can back right into the building and pour directly; no concrete pump or wheel barrels!  Then Rick can come back in and set the trusses, roof and finish the walls.  That's the plan and it's scheduled to begin August 6.

Rick has been very accommodating and seems willing to do whatever we need to get what we want.  He has agreed to install windows that I provide.  I'd spend my time finding a deal, rather than have him order full retail.  I want awning windows (hinged at the top, bottom swings open) so that they can be open in the rain.  They are also a bit more secure; difficult to climb into.  I found that no one stocks awning windows, special order only, so no easy deals are to be found.  I searched the internet for discount suppliers for hours. I found a place in West Virginia that we were traveling near, so gave them a call to check their inventory.  "Oh ya, we've got them.  We've got all kinds of windows."  When we got there we could only find one tiny awning window.  When I asked where all the awning windows were, he said," Here, just take these casement windows and put them on their side.  It's just the same.  I do it all the time."   Welcome to West Virgina!!!!  I can't understand why people make jokes about them.

This past weekend, we took a trip to Minnesota to celebrate Jan's daughter, Cammie's wedding to Josh Broberg. Congratulations Mr. and Mrs. Broberg!!!!!


Cheapskate and scrounge that I am, I checked the internet for cheap windows near Minneapolis.  Woo-Hoo!  I found "BMO, Building Materials Outlet" in East Eagan, MN.  So we drove my truck 1100 miles (one way) instead of Jan's Passat.  (That's ok, even though she gets much better gas mileage, her radio only works part time.)  BMO is a liquidator of surplus building material.  The place was incredible! Acres of stuff in warehouses, thousands of doors, tons of cabinets, and hundreds of windows.  Awning windows were still rare.  We dug through piles of windows, and found 6:  3 matching clad Andersens and 3 other off  brands of similar size.  We also bought a 3 panel window (center fixed, 2 sliders) about 5 feet long by 2 feet high.  Seven nice windows for $900.  (plus gas).  I think we will be going back there on other visits to Jan's girls.
 

The floor plan has evolved over these past months.  Early, we planned to include an apartment.  Instead, we will be putting that effort into building a small house (call it the cottage) that we will live in while continuing development of the property (earning money to help pay for all this, possibly building a spec house, and planning and building a larger, but not-so-big, house). The final shop plan (until this week) was to be a basic rectangle 30 feet wide by 40 feet long with a 16X24 foot open sided roof shed addition on one side.  After the wedding weekend in Minnesota, we drove South to set the final placement of shop on the land.  Jan and I messed with it for quite a while.  It just wouldn't quite fit.  Every way we pushed it, or spun it, it ended up too close to a tree or the garage door was blocked.  The answer was to get rid of the shed roof addition.  It would be nice to have covered storage attached, but if we just separated it from the building, everything would work.  We already had a contract with Rick, the barn guy, so we needed to see what he thought.  No problem.  It's nice to work with real people who just want to please us and are grateful for the work.  Now we have a site plan with the shop building at a slight angle from the road and an open storage shed off to the side backing toward the road.  In the next few weeks, Jason will get back out there with his Bobcat and work on the grade.  He will cut and fill so that the building pad will be closer to level (right now, 2.5 foot difference highest corner to lowest) and the surrounding land will drain away.

The other general features of the shop that are (pretty much) settled include an 14 foot wide overhead door in the end wall, a basic bathroom with slop sink, built-in shower and (future) toilet, an enclosed 10 foot wide heated space across one end with storage above, a wood stove to heat the main area.  The color scheme is tan walls with green roof.  I know, bore-ing.


The next big date: August 6.  That's when the building should start to rise from the ground.  About the same time:  water pipe, hydrants, rough-in shop plumbing, power to shop, fence and gate.  Then wiring, framing, insulation, plumbing finish in shop, gravel, clear driveway and house sites.

Sunday, June 3, 2012

Being surprized and getting burned

I got a phone call from the electric company a couple of weeks ago.  They were about to set our new power pole and install our power drop.  Since they were adding a new pole for our place, they wanted to eliminate the next pole down the line.  They asked if I had any objections as they would have to cut a little brush to get access to remove it.  "No problem", I said.  So when we arrived Friday, May 25, for our next bit of work at Moss Hollow, we were shocked to say the least.  We did not recognize the place.  The power company had totally cleared at least 20 feet of brush and trees under the wires and back from the road the entire length of our frontage.  What we had left as a nice buffer and screen was gone!

BEFORE

AFTER


Of course, my first reactions ranged from shock to extreme anger.  But what can we do?  It actually gives us some other options for developing a plan for the face of the place.  We will need to create a new buffer/screen, but now we can do it with more ornamental plantings.  We have talked for a long time about having a grove of sumac trees.  We now have a nice place for that.  I see dogwood, redbud, forsythia in the future.  We now look at this as an opportunity.  The big lesson learned is: "Don't take anyone's word for what they will do.  And be there when they do it!"

That day, we also met Rick Ward (our pole building contractor) at the site.  I had thought that we could get our brush piles burned, cleaned up, the building site finalized, and the building pad prepared all in this 3 day trip.  Rick was ready to start the building in about three weeks and I said to put us on his calendar.  (A week later, after not getting much of this done, and considering the power company mess, I called him up and re-scheduled for August.)

Saturday morning Jason met us to torch the brush piles, now dried down and ready.  He also put a great effort into cleaning up the mess that the power company left (piles of trees and brush shoved into the woods).  Jan and I kept busy weed-wacking, trimming, cutting giant grape and creeper vines and picking up  deadfall and trash.  It was over 90 degrees and near a very large fire, but the humidity was un-typically low and a nice breeze helped.


That's really about all we accomplished on this trip.  The piles needed at least a few days to burn down.  Jason came back out Monday after we left and sorted out the burn piles; pulling out dirt and re-piling burnables.  We'll be back in a few weeks for the next steps.  Then we'll make a final determination on the exact placement of the shop building.  Then Jason can do more earthwork leveling a pad for it.  We also hope to locate the water line and maybe run some pipe and set a hydrant.  I'll also add a breaker box and receptacles to the power pole.  And then we'll locate the cottage and house sites and the drive down to them.  Jason can clear them in his spare time (he has soooo much of that!).  And, of course, weed-wacking and clean-up is never ending.