Wednesday, December 23, 2015

Inside Work

 
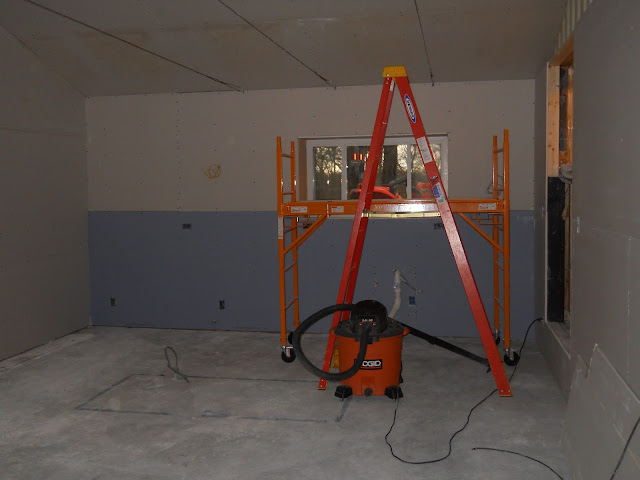
Now that the outside is wrapped up, I'm concentrating on getting more done on the inside.  Most of the decisions have been made for some time, but, of course, specific placement of sockets and lights had to be done as I did the wiring.  We also had to make the final decision on whether we would have an electric range or gas.  We have had electric cooking surfaces for the last 6 years and certainly prefer gas.  So gas it is; even though the propane tank and all will cost us another $1000.  I put a pipe through the wall, but the tank and underground supply will have to wait. The final configuration for the island is still to be determined, but I did pull an electric wire through a conduit set under the concrete to provide power to the island.


I also had to pay attention to where the sink drain and vent should go.  The water supply pipes would need to be installed after the foam insulation was sprayed so it would end up in the warm side.


I hired a local contractor to do this installation because they could do it right away.  They didn't do a great job.  The thickness of the foam varied widely; some places it was super thick, others barely enough.  So the worst places in the ceiling, I added fiberglass bats left over from other projects.


Tony Reynolds, the guy that hung the sheetrock in our apartment came in to install the walls and ceiling here.  He and his helper had it all hung in less than 5 hours.  Even if I was physically capable, it would have taken me forever.  


Now, it's up to me to do the taping and mudding.  Then, paint, cabinets, trim, countertop, island, lights, sockets, switches, etc., etc.,,,,,,,


Saturday, November 21, 2015

Exterior Finish

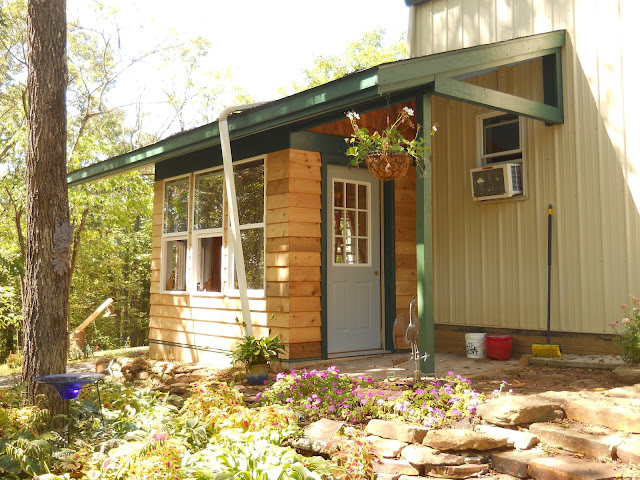
I had some ideas of how the outside of the room should be finished, but (as usual) the final choices evolved over some time.  I knew that I wanted to stress the horizontal lines; complimented by the low pitch of the roof and the wide overhangs and big cantilever of the roof corner.  The foundation insulation actually extends a bit proud of the wall and is capped with a treated wooden sill.  This adds a nice firm visual base to the structure as well as another horizontal element. After the final parge coat of stucco, it will be painted green; relating it to the other green elements as well as adding to the horizontal emphasis. 

For the siding, I was open to using what ever made sense.  Vinyl is zero maintenance, which is nice.  But the problem is all the trim required to cover all the edges of the siding: J-channel around windows and at all inside and outside corners of the building.  I certainly did not want to see that!  Some kind of stucco might have been OK.  But I really liked the idea of the continuous horizontal lines wrapping around all the corners that Cedar lap siding would give me.  I had a small pile of siding that I had gotten some time in the past (yard sale or lumber yard auction), so that got me started.  Of course, that was just the beginning and I had to buy quite a lot more as I progressed.  When I travel, I usually check Craig's list for things on my wish list.  While in Northern Illinois working in June, I found some beautiful old (but un-used) clear cedar siding in Milwaukee.  Even though it was a bit of driving, it was superior quality material at a great price. 


 The windows are all very close to the same height and their tops set level to each other.  This seemed a natural place for a band of color.  This kind of thing is a traditional "Craftsman" detail.  The overall style of the place seems to naturally be evolving into a "Modern Craftsman".  I considered putting a band under the windows as well, but concluded that would be too much.  Besides, the window bottoms don't line up exactly and I would rather not make that obvious.


I attended the annual meeting of the Walter Burley Griffin Society in Madison, Wisconsin in June.  The afternoon was filled with house tours.  Many of the houses had several of the elements that I have used here like wide overhangs, cantilevers, lap siding with mitered corners, and banding.  This was great inspiration!


The next area I needed to address was the gable.  A traditional craftsman detail for the gable is shakes.  This appealed to me.  Also, using cedar (in a different form) added a bit of continuity to the wall surface.  I filled the small area over the door with shakes to see how it looked.  I liked it and decided that would be what I would use in the big gable area.  Then I remembered something I saw some time ago:


While the subject matter isn't appropriate I figured, "If I'm going to the trouble of shingling that whole space, why not add some fun."  If it looks too bad, I can rip it off and try something else.  I first came up with a design for a crescent "Man in the Moon" and star, but knew that was too much for a first try, so kept it very simple.


The shakes really took a lot of time, and I got much better as I went along.  I got within a few hours of finishing it all up when I got sick and ended up in emergency surgery.  My recovery looks like it will push me into winter, so this is where it sits until I feel good enough and the weather allows me to climb ladders again:


12/12/15  Addition:
This week I got my skeletal ass up the ladder and finished the shingles while we had unseasonably warm weather. 


Monday, June 15, 2015

Forward Progress (Said the Tortoise to the Hare)

In the weeks (months) since my last post, really quite a bit has happened, although, on this end it seems like it's been very slow.  I've been doing as much work on the addition by myself as I can.  That, of course, goes fairly slowly.  By May I had gotten most of the framing up.  At that point I realized I needed help. 


The few rafters over the cantilevered part of the roof were not something I could set myself.  The fascia boards will also help support the cantilever and I certainly couldn't get those up in place by myself.  So I hired some pros from Burkey Construction to help me for 2 days.  Chuck, Mike, Ron, and me got the roof framed, the walls sheathed, the roof sheathed, shingled, and the big window installed in 2 days.


The "box" hanging on the wall in the photo above is where the kitchen window will be.  As I was framing, Jan asked if we could have a deep sill on the window over the kitchen sink for plants.  Sure.
So that's what that bump-out is for.  The window isn't there yet because it is still in the old wall inside.  It was our biggest window looking out of our little apartment.  It will be removed to make the new opening between the old space and the new one.

After the guys left, I installed the other windows and sealed the roof/metal wall connection.  The corrugated metal wall presented a  big problem for me here.  I couldn't do a conventional flashing detail because of the corrugations and foam insulation on the inside.  So here's what I did, and so far it's working.  I filled the gaps between the new roof and wall with spray foam.  Then I trimmed all the bulging foam flush with the roof and brushed on a water proofing sealer.  The kit I bought came with a roll of fiber to embed into the sealer for strength.  Followed by another coat of the sealer.  I don't see this as a permanent fix, but if I keep it maintained, I think it will last.  I'll probably just have to re-coat periodically.  Maybe a better solution will come to me, but for now, it's keeping things nice and dry.


Saturday, January 17, 2015

Addition Model

Jan said she was having trouble visualizing how all the elements of the addition would come together.  Could I build a model of it?  No problem.