Sunday, September 2, 2018

Historic and Pre-Historic Moss Hollow

Looking back, for a moment, to the beginning of our journey here at Moss Hollow.  When Jason was pushing dirt around to make our site flat enough for a building, I saw something lying on top of the dirt at the edge of clearing that looked like it did not belong.  It was a grey rock, rather flat, and obviously altered by human hand.

 It was just sitting on top of the ground.  There was nothing similar around.  I think it may have been flipped out by the skid steer, but who knows?  A few weeks ago, I showed it to Mark Wagner and the folks at SIU's Center for Archaeological Investigation.  They said it was about 3000 years old.  This type of artifact is not terribly rare around here.  It is a roughed blank intended to be further refined into a tool or point.  It would usually be found in a cache of several more just like it.  They would be made as the step between the raw stone and the finished item and saved for later refinement or traded for other items.  Forgotten or lost caches of them are found today.  I'm afraid, if there is a cache of them here, it is probably under my driveway now.  I also showed them some chips of similar material that I found on one of the little ridges that extends into Moss Hollow below our designated house site.  They confirmed that they were, indeed, flakes from the chipping process used to make things like the one pictured above.  So I'm thinking that the place we call home was also occupied by people a very long time ago. 

I had something else that I wanted to ask the CAI folks about.  Last spring, before the ticks and chiggers were out, Joss (my granddaughter) and I often took walks around Moss Hollow.  She especially likes to cut straight across the hollow: down one side, up the other.  The downhill part is fine, but my old legs don't care much for the uphill.  On one of these traverses, coming back toward home from the other side, I was taking my time, looking around, giving my legs and wind a break.  Close to the creek bed, on the North side, maybe a couple hundred feet from the head of the hollow I perceived an area of ground that did not look natural.  It was depression about 12 feet in diameter.  It looked to me like it could have been formed by hand.  The spring plants hadn't grown much yet and the lay of the land was quite visible.

This is the view from the South side of the hollow, looking North.  The depression is just left of center frame and just uphill from the creek ditch.
As I approached this depression I spied something else.  Just up hill a few feet from the depression, at the base of a tree was a hole about a foot in diameter.  As I looked closer, I could see it was lined with rocks, obviously man made.  It went straight down about 12 inches where it was filled with leaves.  This thing could be easily missed especially when things are normally grown up.  It's really only visible from one direction, as well.

There is an animal trail running from further down the hollow right past it, left of the tree in the photo.
 
 
I showed these photos to the CAI folks and described the setting,  They said it was probably historic but could be quite old.  This area has been occupied by settlers for over 200 years.  I don't know about the habitation of my exact parcel before the early 20th century. They really couldn't tell me anything conclusive.  I would love to get a pro out here to see it in context. The whole thing is quite a mystery to me. The location is odd.  It's quite a way down the slope from any potential building site. And it is pretty rugged; not an area that would have been good pasture. It looks like this might have been a spring at one time that fed the artificial pool below.  But no water flows now.  This spot is situated up the hollow from the 2 fingers of small ridges that poke into Moss Hollow. The animal trail leads right from the "ridges" to the "well".  The ridges look a bit unnatural to me and that is where I found the flint chips I mentioned earlier.  I can imagine them related as campsites and water supply. Later in the Fall, I will clean out the leaves and see if there is anything in there, how deep it goes, and if it will flow again. 

Wednesday, July 5, 2017

New Bed

When you live in a 700 square foot space, storage is always an issue.  Jan had the bright idea to utilize the space under our bed.  She wanted drawers that pulled out for convenient storage.  She also wanted better bed-side tables with more storage space with a drawer and a door.  And, of course, it all should compliment the other woodwork in the great room; live edge cherry.  So what follows is what I came up with.  We eliminated the box spring.  The mattress sits on a plywood deck. (feels fine!)  That gave us more space.  And we raised the whole thing a couple more inches.  That actually makes it easier to get out of bed!  And gives even more space.  All the cherry grain matches across the end and along the sides, from continuous boards.  One long one for the headboard.  The side table fronts are fancy grained that continues from drawer to door.  The drawers are actually boxes on wheels that roll in and out.


Saturday, May 7, 2016

Island

There's not really very much to say about the island.  I'll just post a bunch of photos and you can figure it out. The top is 2 book-matched slabs of cherry with an extra strip up the middle (to make it wide enough) from the Keith Hendee stash of cherry wood. (No, Keith, you can't have it back).  The blue color was matched from cobalt blue Fiesta Ware.  Power was run in a conduit under the slab (actually planned and done from the beginning). The drawer pulls are from our old cabinets.


The last thing to be done was laying the cork floor and setting the base trim. This is an engineered flooring product where the "planks" click together and the whole thing floats as a unit.  Cork is a totally renewable resource.  The cork is harvested every 7 years from trees on plantations, not harming the trees at all.  It has been used on floors for a very long time and lines up wonderfully with our "green" intentions as well as our design sense here where tradition meets modern meets organic.


So, that's pretty much it.  Now we can get the rest of our furniture out of storage.  We will need to figure out what works and what doesn't.  But already this space feels wonderful.  The room is a very nice size, it is very comfortable, and the views out all those windows are fabulous.  Yesterday an appraiser was out to look at our property and when she came in, she said "Should we call this the great room?".  Oh, ya, I think it is!

Saturday, April 9, 2016

More Kitchen Progress


The tile went up without incident.  I decided to stop it just under the shelf.  It would be a huge problem (and lots of weird cuts) to run it all the way up to the ceiling and through the structural cables.  The top row ended at a very good place for the shelf, where the range hood chimney cover could end without any cutting or special fabrication. 
 
The shelf was something else.  I knew it would be tough because it needed to fit exactly between the two vertical slabs that are not very square to the wall. I also needed to provide support through the length. I did not want the supports to show, so I set steel pins into the studs and had to drill corresponding holes in the edge of the shelf.  Good luck with that, right?
 

I measured very carefully and did my best to drill level.  I still needed to drill the shelf holes oversize to get the pins to go in.  I do not have photos of me pounding on the shelf with a sledge hammer to get it to the wall.  But it did get there.


This part of the kitchen is basically done.  Now on to the island.

Sunday, March 20, 2016

Kitchen Cabinets

Our basic design style for the new addition is organic modern.  The trim, shelf unit in the shop end gable wall, the kitchen shelves, island top, and kitchen cabinets will all be cherry.  Jan has a pair of secretary desk shelf units made of cherry that set the tone.  And, of course, we have all that great cherry from my friend Keith Hendee.


I am custom building all the cabinets using a technique I saw in an old carpentry textbook.  Instead of the modern way of putting a kitchen together as a bunch of boxes, I am building the cabinets in place.


In order to reinforce the modern style, the doors and drawer fronts will be flat panels with the grain running horizontally.  Also there will be no knobs or handles; the drawers and doors pop open with a bump.


I fabricated the Corian countertop with the help of the guys at FWS (http://www.f-w-s.net/).  The owner Al Kuczynski and I go way, way back.  In fact I did several projects with him in the earliest days of FWS.


Still need to design and build the island.  It will be in front of the range and most of the sink, pretty much covering the bottom left corner of the above photo and under those hanging pendant lights (they have very cool mod globes).  I do know it will be topped with live edge cherry and probably painted grey.

The wall tile should come in this week.  It is warm grey, 4"X16".  That should really add a lot to the look.  Then that very cool glass range hood and more live edge shelves finish off the wall.  Can't wait.

Sunday, January 31, 2016

Appliances

It is always best to have the appliances (at least) chosen, (even better in hand), when doing the electric, gas, water, sewer, and ventilation rough in before the walls are closed in.  So I had been trying to pin these things down for quite a while.  The problem is, I couldn't make firm decisions early on.  I needed to be flexible on purchases to take advantage of the best prices.  I also didn't want to buy things way before I needed them; tying up money.  Most kitchen appliances are more or less standard in size, but connections can vary.  I found examples on line that I liked and set rough-ins to them, hoping the final pieces would match up.  We wanted good quality, quiet and efficient operation with stainless steel finish.

The one thing I knew could not be set as standard was the range hood.  I really wanted a special modern style one with a glass hood.  I wasn't positive I could find one at a good price, so my priority was to find one ASAP.  If I couldn't find one cheap enough, I would have to change my plan.
I had been watching Searsoutlet.com for a while.  This is a great place to get bargains.  Sears posts all it's clearance, closeouts, refurbished, returns, etc..  They have outlet centers all over the country, but also list things located in stores. There are 3 centers in the St. Louis area; close enough for us.  I had been looking there for this range hood for weeks.  There were several listed, but none cheap enough or close enough. Finally, just in time, one showed up in Paducah, Ky. (just 50 miles from here).  I jumped on it.
 
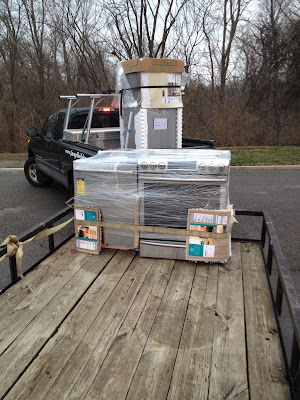
We have still been struggling with colors, so we took an excursion to Cape Girardeau, Mo. to look at furniture.  While there, we took a look at the appliances a the Sears store.  Jan saw an apartment sized refrigerator there that she liked.  It was nicely styled, not too small, and stainless steel finish.  We don't really need a big fridge and the saved space would be helpful.  I planned to go back with my truck in a couple of days to get it (while it was on sale).  Back at home, I took a look at Searsoutlet.com to check for better deals before we pulled the trigger.  There were several of the same fridge (new in the box) listed in Kansas City area at a big discount.  I needed to deliver some horse jumps to K.C. anyway, so why not just pick up a fridge while there?  A few days later, I saw even more of this model of fridge listed at the outlet center in Fairview Heights, IL (this side of St. Louis).  Apparently, they are closing out this model.  Great timing.  We hooked up the trailer and headed north. 
 
 
Since we were making the trip to the Sears Outlet Center for a refrigerator, we figured we would check for deals on a range and dishwasher as well.  We also wanted to be sure there wasn't some amazing deal on a full sized fridge.  There wasn't.
 
The range needed to be a gas slide-in with stainless finish.  I had researched them a bit and found that they are quite a bit more expensive than free standing ranges, but we really wanted the built-in look of the slide-in.  The outlet store had 2.  One of them was about half the retail price.  No noticeable scratches or dents;  must have been a return.  Sold.
 
 
The criteria for the dishwasher was stainless, good quality, and QUIET.  We did spend a bit more on this one than we had planned, but, again, our choice was a high end excellent quality and very quiet unit priced about half of the original price.  When I down-loaded the installation manual a couple of days later, I realized that the power cord was missing.  I called the outlet store and the manager told me to order the part I needed and he would credit my card for the cost.  Wow, that was the most painless complaint I have ever had!


Wednesday, December 23, 2015

Inside Work

 
Now that the outside is wrapped up, I'm concentrating on getting more done on the inside.  Most of the decisions have been made for some time, but, of course, specific placement of sockets and lights had to be done as I did the wiring.  We also had to make the final decision on whether we would have an electric range or gas.  We have had electric cooking surfaces for the last 6 years and certainly prefer gas.  So gas it is; even though the propane tank and all will cost us another $1000.  I put a pipe through the wall, but the tank and underground supply will have to wait. The final configuration for the island is still to be determined, but I did pull an electric wire through a conduit set under the concrete to provide power to the island.


I also had to pay attention to where the sink drain and vent should go.  The water supply pipes would need to be installed after the foam insulation was sprayed so it would end up in the warm side.


I hired a local contractor to do this installation because they could do it right away.  They didn't do a great job.  The thickness of the foam varied widely; some places it was super thick, others barely enough.  So the worst places in the ceiling, I added fiberglass bats left over from other projects.


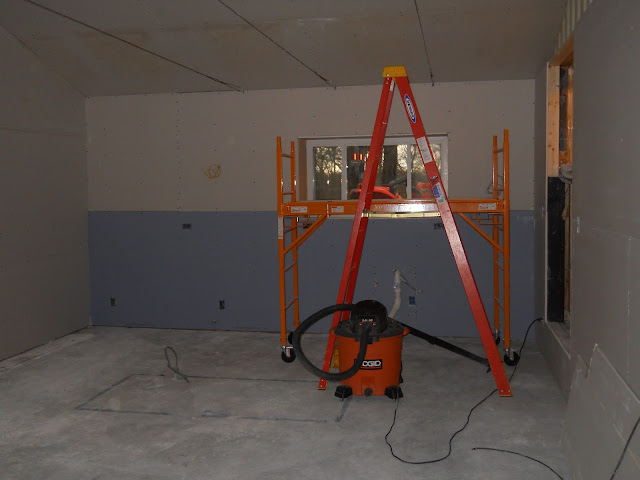
Tony Reynolds, the guy that hung the sheetrock in our apartment came in to install the walls and ceiling here.  He and his helper had it all hung in less than 5 hours.  Even if I was physically capable, it would have taken me forever.  


Now, it's up to me to do the taping and mudding.  Then, paint, cabinets, trim, countertop, island, lights, sockets, switches, etc., etc.,,,,,,,